Back to: C Programming for Beginners
There is an age-old tradition among old and new programmers to print “Hello World” as the first thing they do when learning a new programming language. In this lesson, we are going to dive headfirst and print Hello World in C. This will familiarize us with the Interface of the Codeblocks IDE and how to use it.
Table of Contents
Running CodeBlocks IDE for the first time
After Installing CodeBlocks in our system as we did in our previous lesson we can open it in various ways. On Windows, we can go to Start and search for CodeBlocks in the Search panel. Alternatively, we can double click on the shortcut icon of CodeBlocks present on the Desktop.
Similarly in Ubuntu and MAC OS, we can search for CodeBlocks in the Search window. In Ubuntu we can also write the following command in the terminal for opening CodeBlocks:
|
1 |
$: Codeblocks |
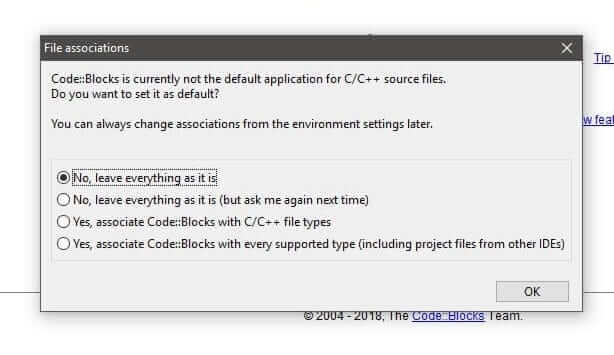
We can choose the settings we like. If we want CodeBlocks to become the default program for all our C/C++ related files, we can select Yes. For now, let’s select No and leave everything as it is.
Description of the CodeBlocks IDE main window
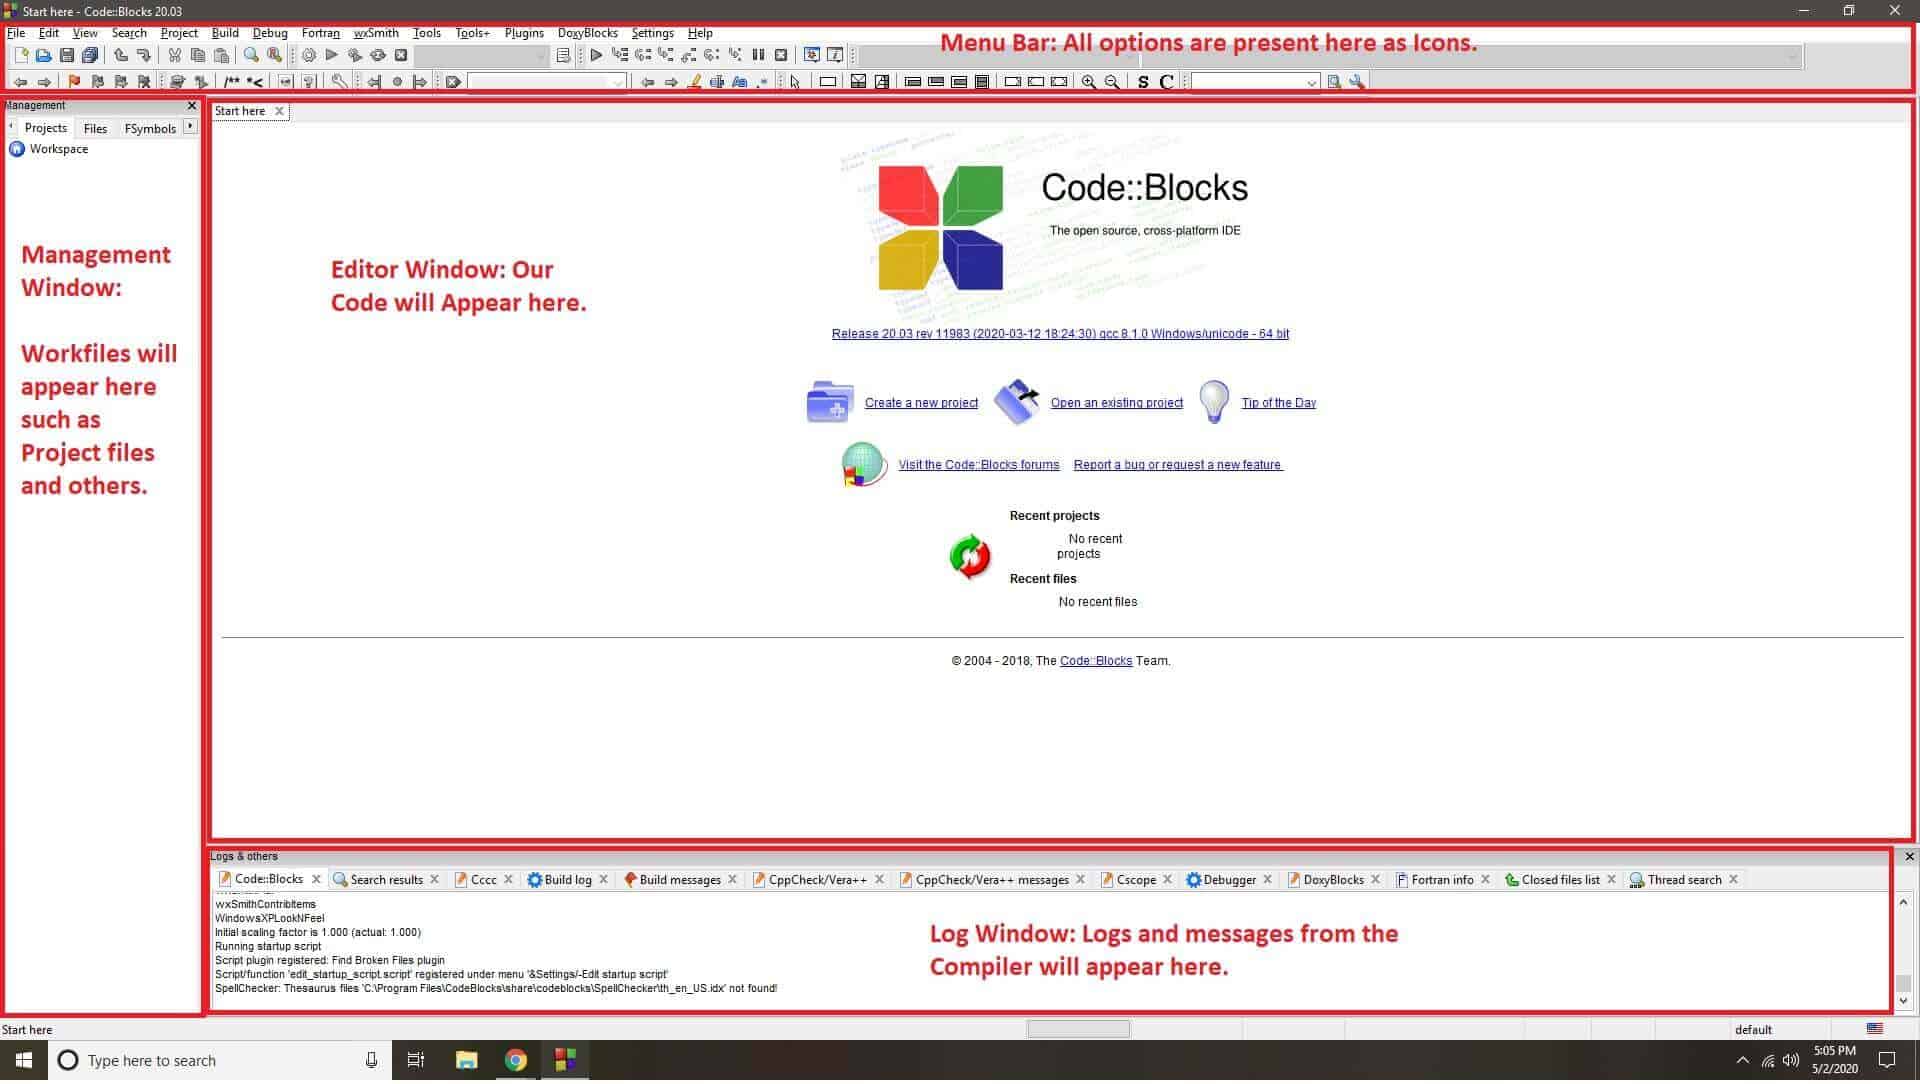
Once CodeBloks completes loading we are presented with this window below:
The entire window can be divided into four sections:
- Menu & Tool Bar: Similar to other GUI based programs, this bar provides all commonly used commands and options needed for editing, building, saving, debugging and running of code.
- Editor Window: This is the inbuilt editor window of the IDE. We will be using it to write and debug code.
- Management Window: As the name suggests we can manage various source and library files from this window.
- Log Window: This is where we will get various log messages from the IDE such as Build messages, Compilation and run-time errors and more.
Creating a new Project
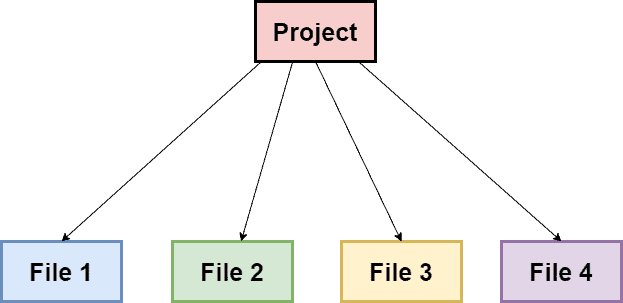
To create and run projects in Codeblocks, we would first need to create a Project. Now the question that arises is – What is a Project? In simple terms, a Project is a collection of various source files which are compiled together to create a common executable file. In our case, right now, we will only have one ‘dot C’ file which would contain the code for displaying Hello World in C. But think of a big application containing hundreds of ‘dot C’ files, sharing code and functionalities among themselves. Here, all these files are contained inside one common Project.
Steps for Creating a New Project
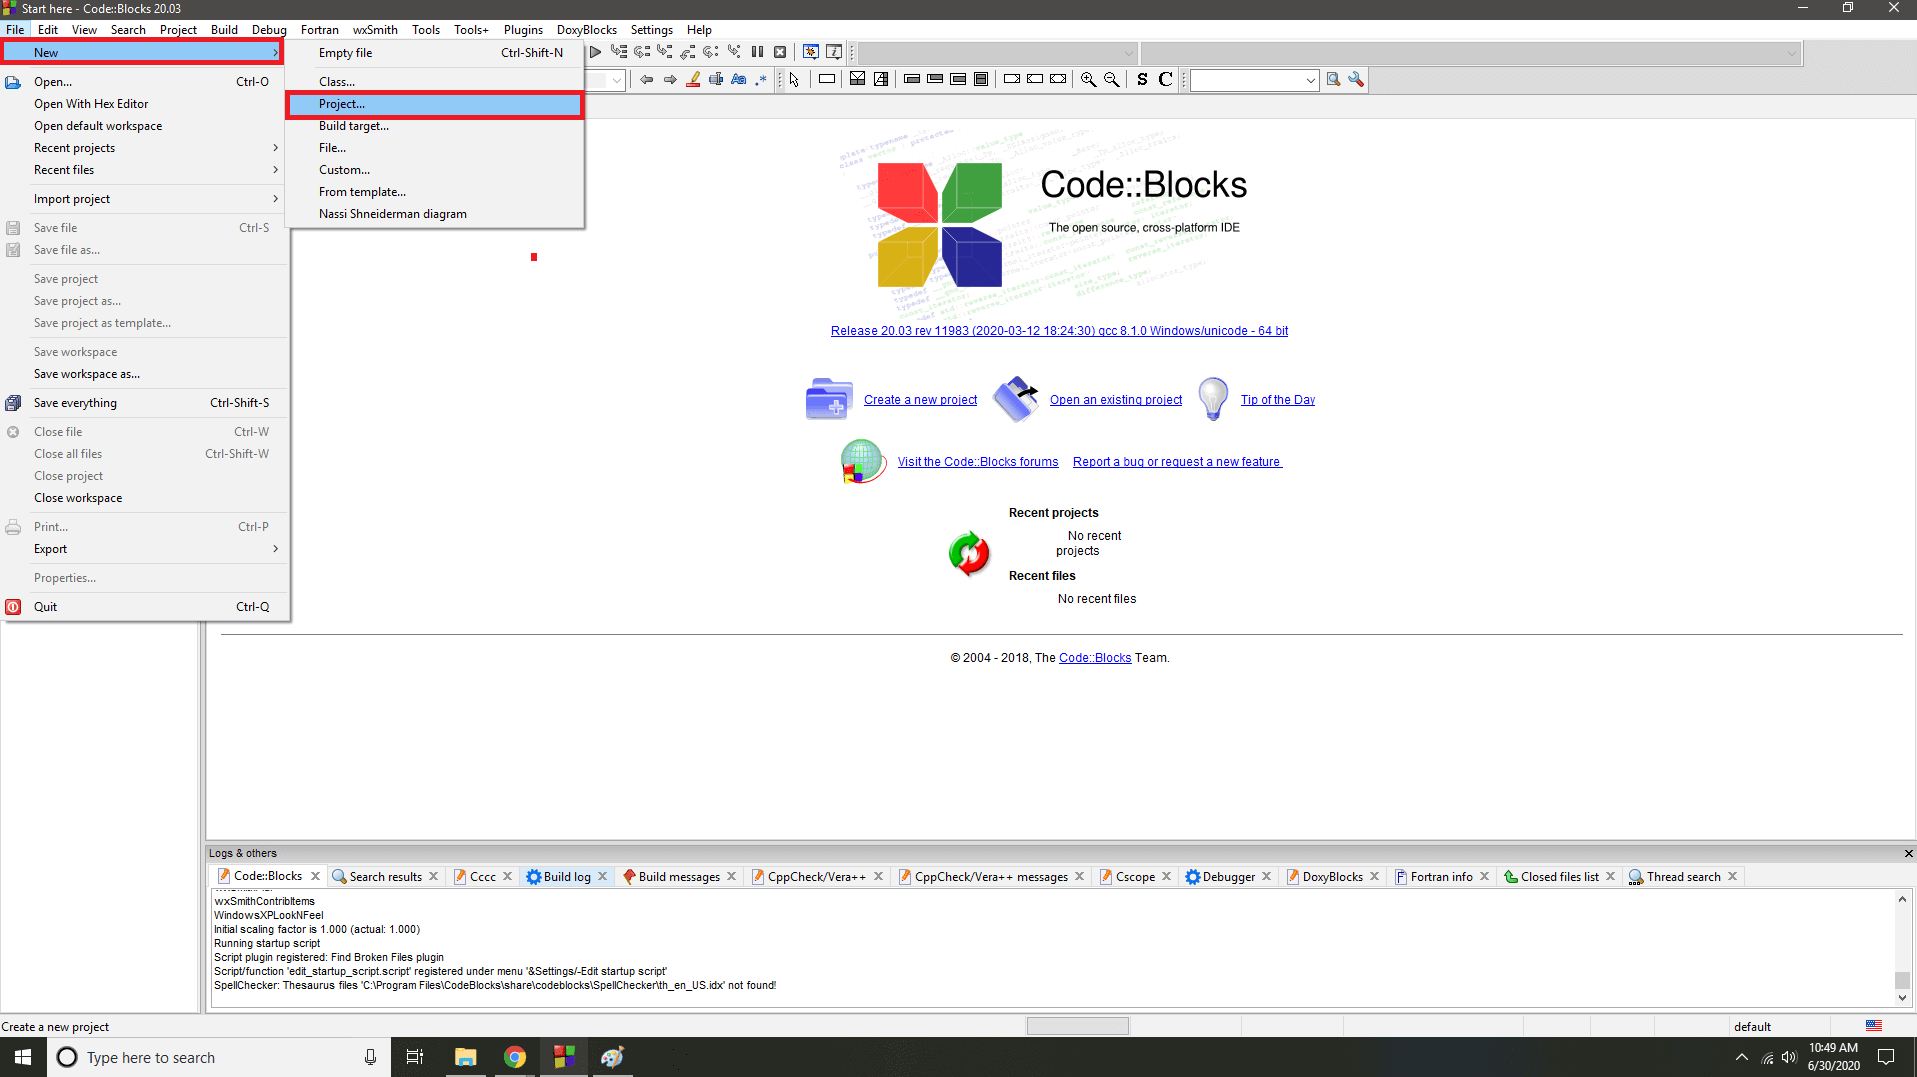
- To create a new Project; Goto File -> New -> Project
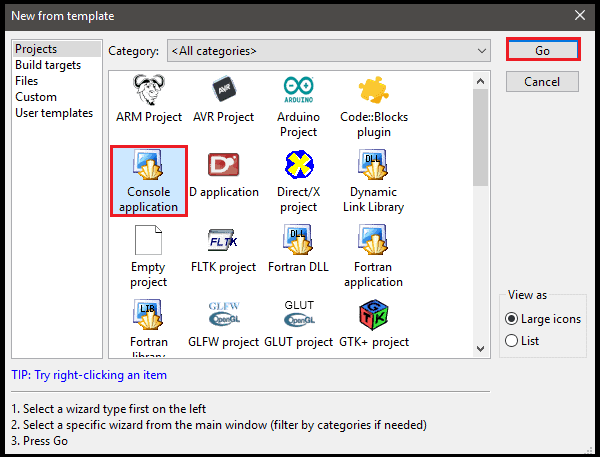
- A Wizard Screen will appear as shown in the screenshot below. We need to select “Console Application” here and then click on “Go”.
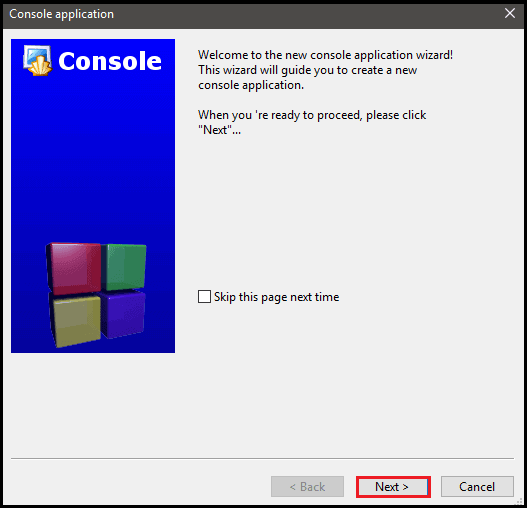
- This will result in a “Console Application Wizard” popping up. We will click on “Next” here.
- In the next window, we need to select the programming language that we want to use. In this case, we will select “C” and click on “Next”.
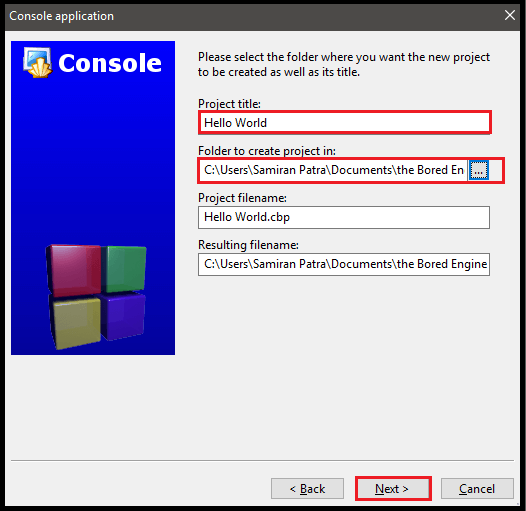
- In the next window, we need to choose a project name and set the path where we would like to save it. For this case, I have selected the name as “Hello World”. Keep in mind that all files related to this project will be created and saved at this location. We need to click on “Next” to proceed further.
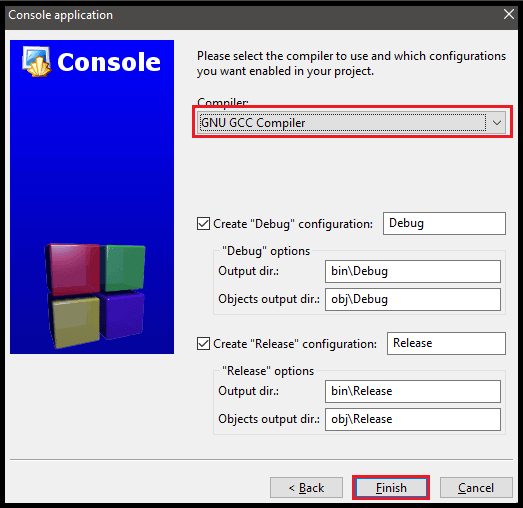
- Next, we need to select the Compiler we want to use for this project. Depending upon your system and the compilers you might have installed earlier, you might see different options in the dropdown menu. We need to select the “GNU GCC Compiler” for our purpose. This compiler is installed automatically during the Codeblocks installation process and should be available in the dropdown menu. We will leave all other options to their default setting and click on “Finish”.
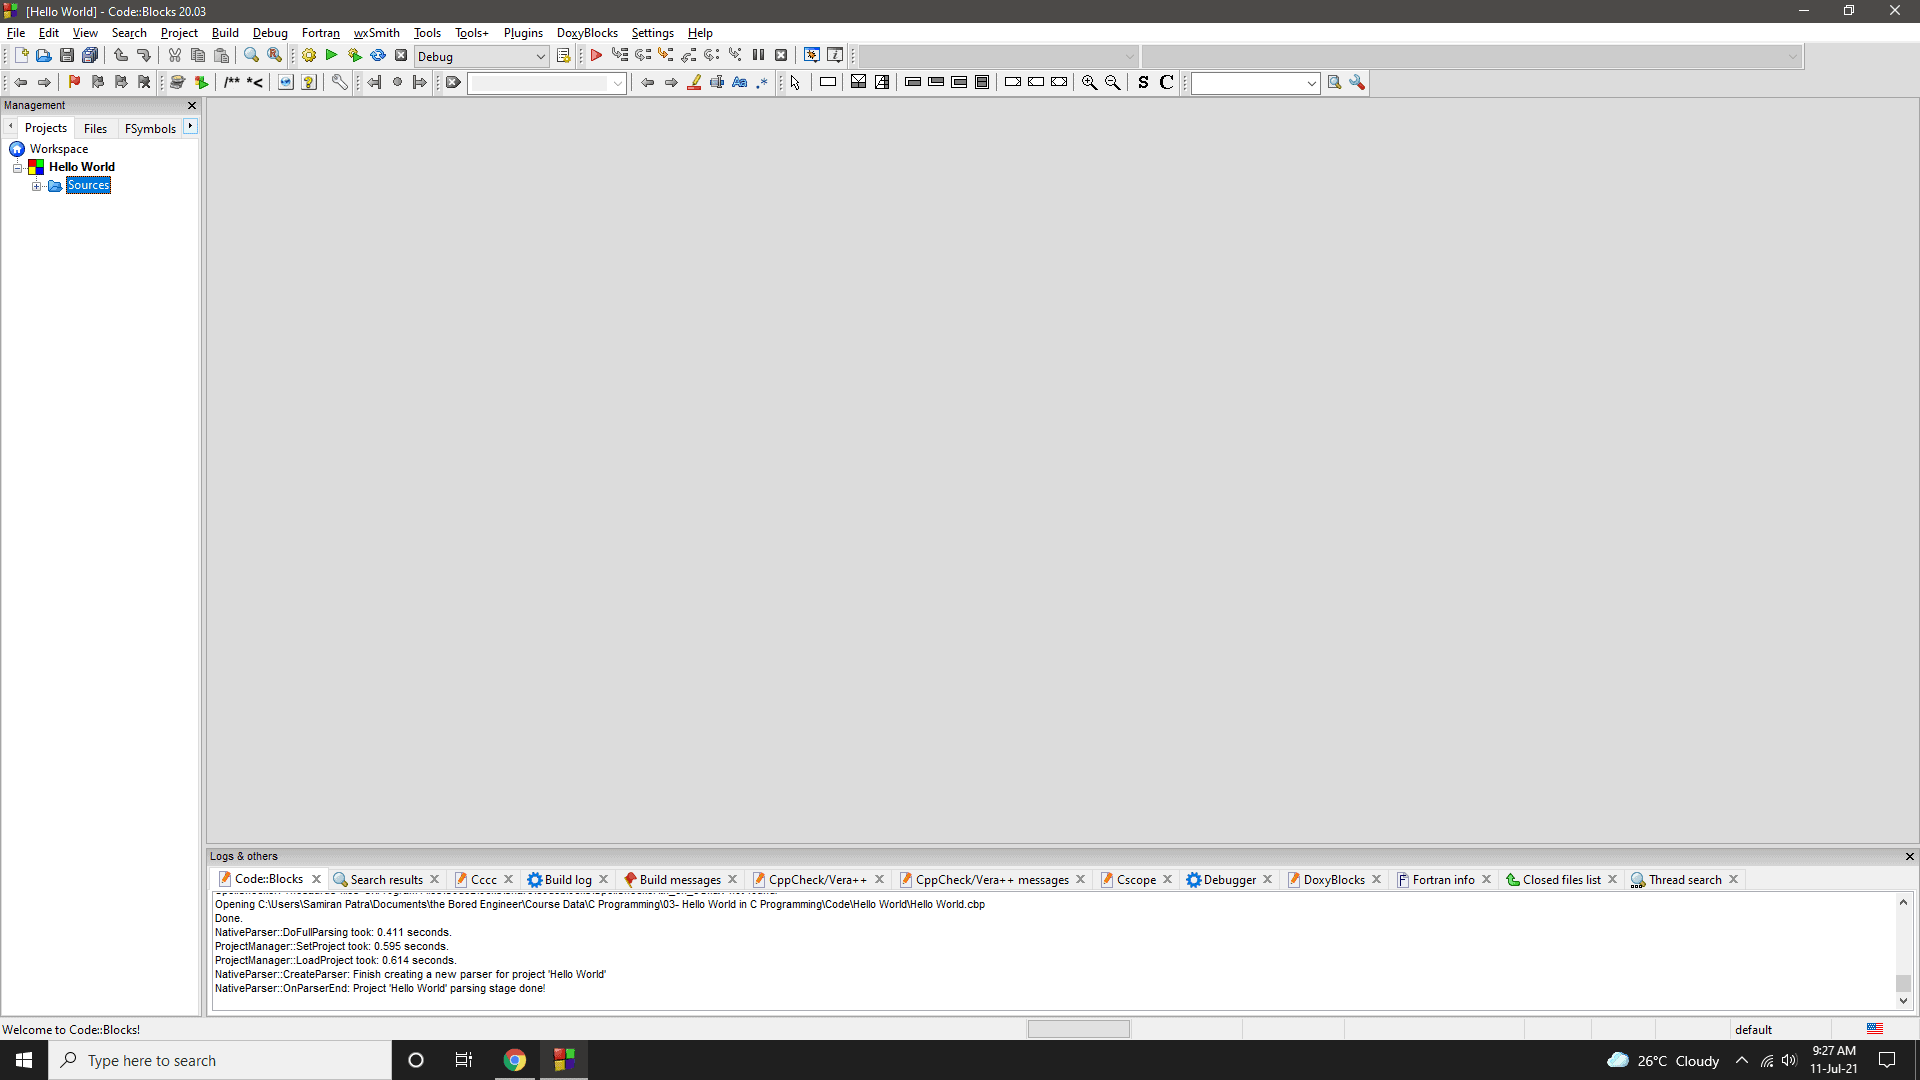
Now the Codeblocks IDE will look something like this:
Running New Project
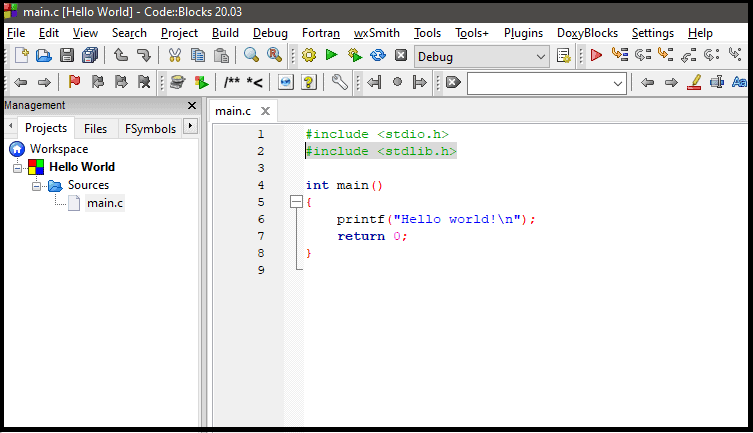
We can double click on the Sources folder to view all Project files under it. By default, a main.c file would have been created here.
We can again double click on the file to open its contents in the Editor window. We will do the same here and find a small snippet of code already written as mentioned below. This is the “Hello World” code we have been talking about:
|
1 2 3 4 5 6 7 |
#include <stdio.h> #include <stdlib.h> int main() { printf("Hello World"); return 0; } |
We will surely talk about how the program works in later lessons. For now, let us run this program.
First of all, we would need to save this program. We can do this by hitting the Save icon in the toolbar or by pressing Ctrl+S from our keyboard.
We now need to build the program. This is nothing but the compilation process. We can do this by selecting Build->Build from the Menu Bar or by pressing Ctrl+F9 from our keyboard. Once we do this, we will see messages in the Logs window as shown in the screenshot below:

Notice that the last line of the log says "0 error(s), 0 warning(s) ". It simply means that the program is compiled successfully without any errors and warnings.
We can now run this program by selecting Build->Run from the Menu Bar or by pressing Ctrl+F10 from our keyboard.
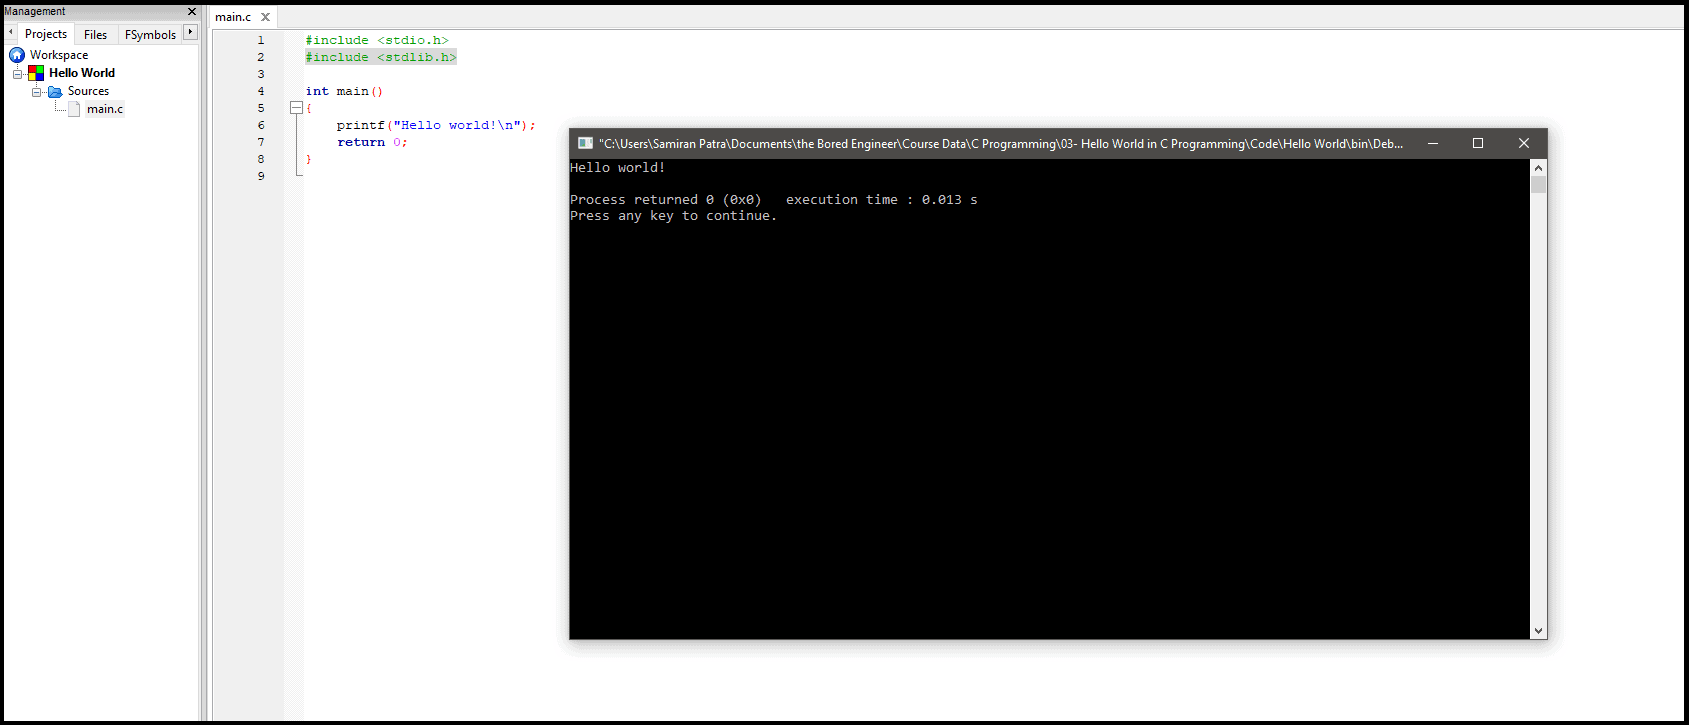
We can clearly see that “Hello World” is being printed when we run the program in a popup window. In the next lesson, we will discuss all the elements of a C program and try to understand the code that we saw in this lesson.
Best C Programming Books
List of C Programming books curated for beginners as well as experienced programmers.
Sharing is Caring
If you liked this post, then feel free to share it with your loved ones!

